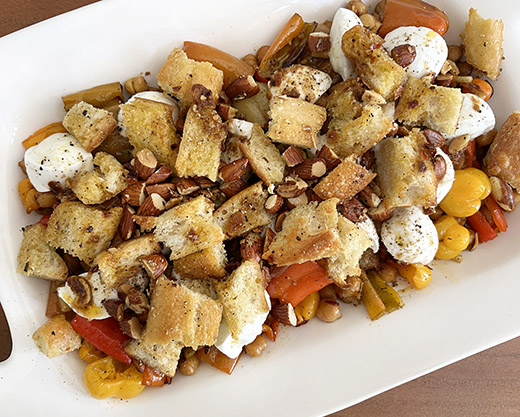
I don’t remember exactly when I became obsessed with cookbooks. But, I do recall that in the early days, I read about Judith Jones. I learned how she was the editor who brought Mastering the Art of French Cooking into being. She worked with so many cooking legends from Julia Child to Claudia Roden, Madhur Jaffrey, Edna Lewis, Irene Kuo, Marcella Hazan, Marion Cunningham, and on and on. I started collecting books by each of them. It’s no surprise that I was delighted to read the latest by Claudia Roden. This new book shares her favorite dishes from several seaports and cities around the Mediterranean where she has spent a career reporting on the cuisines. I received a review copy of Claudia Roden's Mediterranean: Treasured Recipes from a Lifetime of Travel, and in it she tells of fond memories of places she lived or visited and the recipes from those places that are her favorites and ones she prepares for family and friends. The photos show the food, of course, but also the idyllic places mentioned. A quote by Joseph Pla at the beginning of the book reads: “Cooking is the landscape in a saucepan.” That sums it up. The recipes include everything you need to plan a simple meal for entertaining: Appetizers, Soups, Salads, Vegetable sides, With grain, Seafood, Meat and poultry, and Desserts. The first recipe in the book sent me on my way to make some focaccia that’s perfect with the dips and spreads for appetizers. Also, I made the Green Olive, Walnut, and Pomegranate Salad right away. The story behind the Sweet-and-Sour Peperonata sounds like a book of its own. It’s about a visit to Palermo and a dinner in an aristocrat’s palazzo. That’s soon followed by a description of farmer’s market shopping in Provence. I’m looking forward to spring shopping at our local farm stands when I can gather everything for the Lemony Roast Potatoes with Cherry Tomatoes and Garlic. There are couscous, polenta, barley, rice and pasta dishes. One of the simplest, Malloreddus al Caprino Fresco, from Sardinia has me intrigued. It involves just pasta, fresh goat cheese, lemon and orange zest, and saffron. There’s even a simplified b’stilla made with chicken and topped with puff pastry. But, the desserts might the simplest of all. The no-churn, frozen Parfait Mocha Praline topped with a chopped hazelnut brittle looks delicious and easy to execute. Before I try that, I have to tell you about the Mashed Chickpeas with Turmeric.
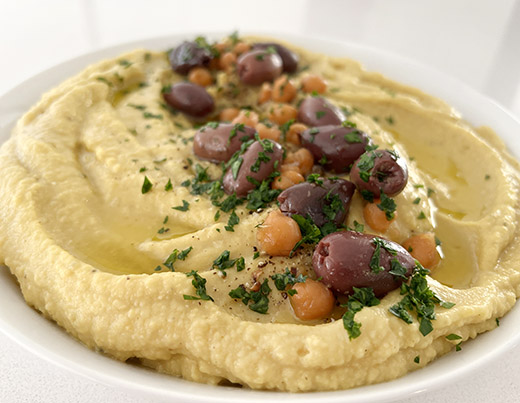
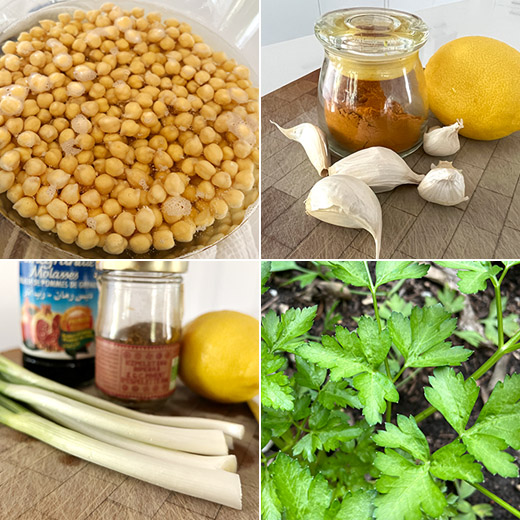
Chickpeas with turmeric comes from Tunisia, but the added toppings are up to you to pick and choose from several Mediterranean options. The chickpeas were soaked overnight before being drained and then placed in a large saucepan with lots of fresh water and some baking soda to help them soften. Peeled garlic cloves and ground turmeric were added, and the chickpeas simmered until tender. The goal was for the liquid to reduce to a small bit of thick sauce while the chickpeas cooked. A few whole chickpeas were kept aside for garnish before the rest with the sauce was transferred to a food processor. Olive oil, lemon juice, and salt and pepper were added before pureeing.
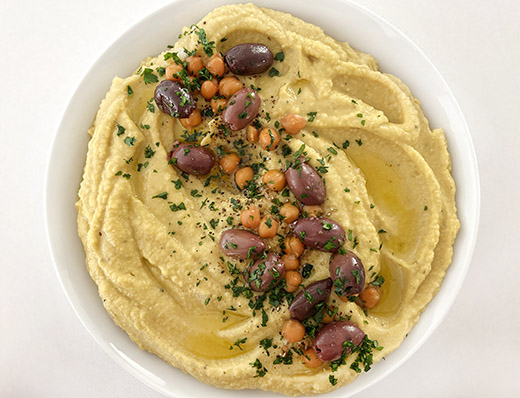
I served the puree with olives, parsley, the reserved whole chickpeas, and a drizzle of olive oil on top. Being transported to the Mediterranean, even if only virtually, is a joy. These simplified dishes can bring all the flavors into your kitchen with ease. My obsession with cookbooks hasn’t waned, and I’m happy to add this one to the collection.
I am a member of the Amazon Affiliate Program.


 , and I received a review copy. Of course, there is a chapter just for cookies. There’s a lot of other great food too, and I got distracted with the mix of vegetarian and omnivore dishes on my way to the cookies. The book and the blog are about a couple that loves to cook for their little boys, extended family, neighbors, and friends. The recipes they share are tested, family favorites. And, they really do love cooking and bringing people together around good food. Right away, I found some of my favorite flavors in the book. The Sweet Potato and Kale Hash, Raspberry-Lemon Scones, and Green “Hulk” Smoothies stood out in the Breakfast chapter. The hearty soups like Creamy Roasted Cauliflower Chowder and Mushroom-Farro Soup had me looking forward to cooler days. I’m marking the page for the Kale and Wild Rice Salad with Maple Mustard Vinaigrette for a Thanksgiving menu contender, and I can’t wait to try the Sweet and Spicy Tofu with Zucchini Noodles right away. Now, about that cookie chapter: there are Our Favorite Chocolate Chip Cookies, Mega Monster Cookies, Lemon-Almond Cookies with Lemon Glaze and more. The one that called out to me, though, was the Toasted Coconut White Chocolate and Macadamia Cookies. I’ve never added coconut to white chocolate-macadamia cookies or thought to toast it first. That’s a must-try. Before I could pre-heat the oven for those, I first set about making the BBQ Chickpea-Quinoa Bowls.


 by Alice Hart of which I received a review copy. This new book is a paperback release of what was titled Good Veg as a hardcover in 2016, and it’s full of great ideas for vegetarian dishes for any time of day. Along with the recipes and photos, there are also added ideas and variations sprinkled throughout the chapter introductions and recipe head notes. For example, something I can’t wait to try isn’t written as a recipe but was just mentioned in the Mornings chapter intro. It’s a suggestion to make savory French toast by adding garlic or paprika to the custard and serving it with roasted tomatoes or wilted spinach and goat cheese. Some of the dishes include dairy or eggs, and some are vegan, and substitutions are offered. There’s also acknowledgement of time and cost, and when a step may take too long or an ingredient might be too pricey other options are suggested. Several dishes have southeast Asian influences, and vegetarian “fish” sauce is listed among the ingredients. You’ll find the recipe for the sauce in that last chapter I was praising, and I was delighted to see it’s not too time-consuming to make. You’ll also find a recipe for Vegetarian Nuoc Cham, Pickled Sour Cherries, Sweet Pepper and Chile Jam, and a Thai-Style Roasted Chile Paste. That last one sent me backwards in the book to revisit the recipe for Brown Rice Bibimbap Bowls with Smoky Peppers where it’s used, and that made me happy to have read all the way to the end. Back at the front of the book, I got a bit distracted by the Chia Jams. I’d seen this method before of using chia seeds to thicken a jam rather than adding as much sugar as usual. When I saw it here, I finally gave it a try and loved chia-thickened peach jam with a little honey. I also tried the


