Showing posts with label bread. Show all posts

Tuesday, April 25, 2023

Sun-Dried Tomato, Goat cheese, and Walnut Monkey Bread

I generally, mostly, when not celebrating a special occasion, try to avoid sugar and stick to more savory fare. Armed with a new book devoted to the non-sweet side of baked goods, I was excited to pull out some pans and get the oven pre-heated. Savory Baking is from Erin Jeanne McDowell, and I received a review copy. This isn’t a gimmicky approach of turning sweet recipes into things that aren’t sweet. This is an informative baking book that teaches great technique through recipes that are savory, although there are also some suggestions for making sweet variations. And, in addition to the baked goods, there are recipes for putting them to use. For instance, there’s Green Chile Sausage Gravy to go with Buttermilk Biscuits, Always Salad to go with Flaky Frico, and Mama’s Salmon Sandwiches for Ciabattina Rolls along with quick pickles, sauces, flavored butters, and more. I knew this book was going to deliver great results when I read the thoughtful explanation about when and why to cut butter into flour at the size of walnut halves versus the size of peas versus the texture of cornmeal. Helpful information is found in every chapter like perfecting crepe-making, methods for cooking flatbreads, and strudel dough handling. I especially appreciated the chart that shows how much focaccia dough to make to fit different pan sizes. There were oodles of things I wanted to try, but first was the Pickly Pepper Bialys. I used to eat bialys on occasion when I was a college student in Illinois, but I’d never made my own. They’re very similar to bagels minus the hole in the middle. I have made tortillas many times, but I usually make corn rather that flour. I suspected the recipe for flour tortillas here would be a winner, and I was correct. I went with the spinach version and was delighted with them. The savory pastries all look delicious, and I have my eye on the Croissant Breakfast Pie. Also, the Roasted Garlic Naan, the Pizza Babka, and the Stuffed Pretzels all look hard to resist. I might have to bake page by page through the Snacks, Bites, and Appetizers chapter with Parmesan Palmiers, Jalapeno Pastry Poppers, and Panfried Mushroom Dumplings to name a few options. Circling back to something I’d never made before, I needed to try the savory monkey bread. 

Monkey bread always looks addictive. I’m not sure why I’d never made it before, but this recipe with sun-dried tomatoes, goat cheese, and walnuts was too interesting to skip. The yeasted dough was made with milk, milk powder, one egg, butter, and creme fraiche. While the dough proofed, the filling was made by cooking sun-dried tomatoes with smashed garlic and olive oil. Off the heat, butter was added with herbs and tomato paste. The mixture was pureed, goat cheese was crumbled and blended with creme fraiche, and walnuts were toasted. Working with the dough was fun and a little messy. First, it was rolled into a big square, and the goat cheese mixture was spread over one half. The walnuts and sesame seeds were sprinkled on the goat cheese. The dough was folded over and pinched around the edges to seal. It was rolled out into a big square again before being cut into strips that were cut into little squares. Each little square of dough was dipped into the sun-dried tomato mixture before being placed in a bundt pan. Then, it was left to rise before baking. 

Of course, the garlic and herbs made the bread small amazing as it baked. And, after it cooled a bit, the tender pull-apart pieces were as addictive as I knew they would be. There are other flavor combinations offered including Gooey Cheese Monkey Bread; Caramelized Onion, Balsamic, and Parmesan Monkey Bread; and Roasted Garlic and Herb Monkey Bread as well as other ways to shape the bread like in pull-apart sheets or circles. I want to try all of those and then use this dough for every other thing that comes to mind. I have lots more savory baking to do.

I am a member of the Amazon Affiliate Program. 

Tuesday, December 22, 2020

Sesame Seed Breadsticks

Welcoming, comfort-food cooking is what we all need right now. The new book from Joey Campanaro of Little Owl in New York, Big Love Cooking: 75 Recipes for Satisfying, Shareable Comfort Food, delivers just that. I recently received a review copy. He writes in the introduction: “There is nothing fragile or careful about these recipes. They are not a peck on the cheek. They are a warm embrace.” How timely is that? I was intrigued to see that Calvin Trillin had written the Foreward. I finally, after having the book for ages, actually read his The Tummy Trilogy earlier this year. Little Owl opened in 2006 half a block from Trilin’s home in Greenwich Village, and it was a dream come true for him. He sings the praises of the gravy meatball sliders and how despite Campanaro’s experience at fine dining restaurants he chose to put this dish served to him by his grandmother in South Philly on the menu. His mother and grandmother are two sources of inspiration for the Little Owl menu and for the recipes in this book. The chapters cover Brunch, Soups and Salads, Pasta, Meat and Poultry, Fish and Seafood, Sunday Supper, and Desserts. And, it’s not all strictly Italian-American food. You’ll find Cinnamon Sugar Beignets, Sesame Green Beans, and Citrus and Palm Hearts Salad among other chosen dishes. Campanaro didn’t want to be restricted to solely Italian-American fare at the restaurant, and the name of the business allows room to offer a broader array. The Baked Ricotta Crespelle caught my eye as soon as I opened the book. I can’t wait to attempt making the crepes and filling them. Next, I made the quick and easy Monday Baked Ziti, but since I didn’t have Sunday gravy handy I made a simple marinara for the sauce. And, the Sesame Seed Breadsticks looked irresistible. I had to try them next. 

One other book I want to mention today is Perilous Bounty: The Looming Collapse of American Farming and How We Can Prevent It by Tom Philpott whom I’ve had the pleasure of meeting here in Austin. I received a review copy of this book as well. This is a critical look at American agriculture and how reliant we are on California’s Central Valley and the Midwest. The vast majority of our vegetables, fruits, and nuts come from California where water sources and weather generally have a frighteningly uncertain future. The Midwest is now wall-to-wall monocrops of corn and soybeans with a variety of problems related to soil, seed sourcing, chemicals, federal policies, and demand for these crops. A large part of the harvests from Midwestern fields is fed to factory-farmed cattle and hogs, and the meat industry brings a plethora of its own problems to the mix. The book presents some grim realities but also ideas for positive changes in agriculture processes in both regions. And, one very actionable way forward is to start relying more on other regions of the country for food supply whenever possible. Buying from local and regional farms and ranches takes some burden off those over-worked areas of the country. I’m always happy to support our local food system however I can. For instance, for these breadsticks, I used locally-milled flour from Texas wheat growers. 

A few pages before this recipe in the book, there’s a recipe for the meatball slider buns. For that bread dough, roasted garlic is mashed and mixed into it. I loved that idea and added it to the breadsticks recipe. Mixing the dough and letting is rise is a straightforward process. Then, the dough was rolled into a large rectangle and transferred to a baking sheet. The breadsticks were cut from the rectangle and moved apart. The baking sheet was very full, and I think next time I might split the dough in half and use two sheets for more space to separate them. They were brushed with egg wash and sprinkled with sesame seeds before baking. And, they were as delicious as expected. We couldn’t stop eating them. I’m looking forward to cooking a lot more comforting foods during this holiday season. Wishing you all very happy holidays! 

Sesame Seed Breadsticks 
Reprinted from Big Love Cooking: 75 Recipes for Satisfying, Shareable Comfort Food by Joey Campanaro with permission by Chronicle Books, 2020 

The place to be for bread on Sundays in South Philly was Sarcone’s Bakery on South Ninth Street—a fifth-generation Italian bakery that is still as great today as when I was a kid. Our family’s Sunday supper table wasn’t complete without their sesame seed bread that my grandmother would pick up and tote home in a paper bag. If I was with her, that bread never made it home intact—it was just too good to resist eating off the heel (or more) before we’d reach the door. My mother would have some things to say about it that I can’t repeat. The slider bun recipe makes terrific Sarcone’s Bakery– inspired breadsticks, just eliminate the garlic and the second rise. 

Makes 18 Breadsticks 

1 Tbsp olive oil 
1 Tbsp molasses 
1 1/8 tsp active dry yeast 
2 1/4 cups [315 g] all-purpose flour 
1 tsp kosher salt 
1 egg white, beaten 
1/4 cup [35 g] toasted sesame seeds 

Prepare a large baking sheet by lining it with parchment paper. Brush the inside of a medium mixing bowl with olive oil and set aside. In the bowl of a stand mixer fitted with the dough hook, combine 1 cup [240 ml] of warm water, the olive oil, molasses, and yeast. Mix on low speed to incorporate. Slowly add the flour and salt and mix at low speed first, so that the flour doesn’t fly everywhere, then increase to medium speed, mixing until it comes together as a sticky dough mixture, 2 minutes. Transfer the dough ball to the prepared bowl and double wrap it all around like a tight package (so tight that you can bounce a quarter off the top) and set in a warm place or at room temperature until the dough is doubled in size and becomes soft and elastic, about 1 hour. 

Midway through the 1 hour rise, preheat the oven to 400°F [200°C]. Lightly flour a work surface and turn the dough out. Using a rolling pin, roll it out to a ¼ in [6 mm] thick rectangle or oblong shape roughly 9 in by 13 in [23 cm by 33 cm] in size. The beauty of an oblong shape is that the sticks on the end are shorter than the ones in the middle—a little something for everyone. 

Transfer to the prepared baking sheet and use a pizza cutter to cut the dough into about 18 breadsticks that are about the width of your pointer finger (just eyeball the width as best you can so that they bake evenly). Be sure to separate the sticks a bit so that they don’t stick together when they expand in the oven. Use a pastry brush or a flat rubber spatula to lightly brush the tops of the breadsticks with the egg wash and sprinkle the sesame seeds over them to coat them completely. Bake until golden brown and crispy, 15 minutes. Transfer to a wire rack to cool completely before serving.

I am a member of the Amazon Affiliate Program. 

Thursday, April 2, 2020

Rye Loaf with Currants

My memory is fuzzy on when I became a fan of Poilane. I remember seeing the shop in Paris on a TV show and immediately becoming enamored with the breads and the bakery’s process, but I don’t recall what show that was or when I saw it. I’ve read a lot about this famous bakery over the years, and I recently read more in Apollonia Poilane’s own words. I received a review copy of her new book, Poilane: The Secrets of the World-Famous Bread Bakery. She writes about her grandfather who opened the bakery in 1932 and began making the large sourdough loaves, how her father took the reins in the 1970s and expanded capacity by building La Manufacture Poilane outside of Paris, and the tragic loss of both of her parents in 2002 when she found herself in charge of the business. At the age of eighteen, she was running Poilane while attending college at Harvard. The book explains the changes the bakery has made from one generation to the next and the things that have never changed. The starter is maintained the same way it always has been, the bakers know by feel when the dough is mixed correctly and when it has risen enough, and the ovens are wood-fired as they always have been. The book includes all the information for creating and maintaining a starter just as they do and for baking sourdough loaves, and there are lots of other recipes too. There are other breads like the Black Pepper Pain de Mie and the Rye Loaf with Currants shown here. There are recipes for using bread including one for toast. Of course, Apollonia Poilane has a preferred way of making toast! And, she shares it. She pairs two pieces of bread and toasts them in one toaster slot so one side stays untoasted for texture variation. There are also croissants and brioche and jams for topping them all. One chapter is for main dishes that include bread or croutons or breadcrumbs, and the Savory Pain Perdu topped with chopped tomatoes looks like a great summer lunch. It was interesting to learn more about the Punitions. Those are the little butter cookies left in baskets for customers to nibble while waiting and are also sold by the box. In the bakery, they range in color from just golden to darker brown so each person can choose his/her preference. A generous, fellow food blogger once sent me a box of these cookies from Poilane as a gift. In the box, they were all light golden, and I didn’t know they’re usually intentionally baked to varying degrees of doneness. The recipes also include tarts, quick breads, crepes, and even an oat milk used in a rice pudding that I have to try. But first, let’s get back to the Rye Loaf with Currants. 

This loaf is made with some sourdough starter in addition to commercial yeast. The publisher was not able to provide the recipe and instructions for the sourdough starter, but I can tell you that my starter that I’ve used for ages and maintain at 100% hydration worked fine here. To begin, the currants were soaked in hot water before being strained while reserving that soaking liquid. The starter was mixed with rye flour, and I was fortunate to get some locally-milled rye flour from Barton Springs Mill. Yeast was added, and some of the currant soaking liquid was mixed in a separate bowl with salt before it was added to the flour mixture. The dough was shaped into a ball and left to rest before being shaped again and left to rise. After rising, it went into a loaf pan to proof for about two hours. Just before baking, the top of the loaf was brushed with the remaining currant soaking liquid. 


This is a delightfully easy bread to make once the timing is planned. The slices are delicious toasted and topped with butter, and all those currants make it taste like a sweet treat. I was surprised to read that Apollonia became interested in cornbread while living in the US and went on to develop a Corn-Flour Bread with hazelnuts that’s gluten-free and vegan with corn sourced from the Basque region. I’m looking forward to trying a Texas version of this with local cornmeal and pecans. I think she’d approve. 

Rye Loaf with Currants 
Recipe excerpted from Poilane Copyright 2019 by Apollonia Poilane. Photography Copyright 2019 by Philippe Vaures Santamaria. Reproduced by permission of Houghton Mifflin Harcourt. All rights reserved. 

Makes one 9-by-5-inch (23-by-13-cM) loaf 

My father regularly ran home from the bakery before we went to school to drop off a small version of this loaf for our morning snack. He would cut it in half, add a generous pat of butter, and pack it for us to enjoy in his car. Today I still love to have a few slices—buttered or not—for breakfast or as a midmorning treat. We make this in metal loaf pans, but you can also shape it freeform. 

1 1/2 cups (240 g) dried currants 
2 1/2 cups (595 ml) hot water 
230 g (1 1/4 cups) starter  
435 g (3 cups plus 2 tablespoons) rye flour 
3/4 teaspoon (2 g) active dry yeast 
1 1/2 teaspoons (9 g) fine sea salt 
Neutral oil, such as canola or sunflower seed, for the pan 

Put the currants in a medium bowl, add the hot water, and let soak for 10 minutes. 

Set a fine-mesh sieve over a bowl and drain the currants; reserve the soaking liquid. Pat the currants dry with a paper towel and reserve. 

Put the starter in a large bowl. Add the rye flour and yeast. In a small bowl, combine 1 1/2 cups (355 ml) of the reserved soaking liquid (save the rest for brushing the loaf) and the salt, stir to dissolve the salt, and add to the flour mixture, along with the currants. With wet hands, mix and knead the dough in the bowl until it comes together in a smooth, homogeneous mass. Transfer the dough to a work surface and shape into a ball. Return it to the bowl and let rest for 15 minutes. 

Reshape the dough into a round, return to the bowl, cover with a cloth, and let rise for 1 1/2 hours. Brush a 9-by-5-inch (23-by-13-cm)pan with oil. Turn the dough out and, using wet hands to prevent sticking, shape it into a 9-by-4-inch (23-by-10-cm) log. Transfer to the oiled pan. 

Brush a piece of plastic wrap with oil, drape it over the loaf, and let it rise in a warm (72°F to 77°F/22°C to 25°C), draft-free place until it rises about 1/2 inch (1.25 cm) above the sides of the pan, 1 1/2 to 2 hours. 

Meanwhile, about 25 minutes before baking, position a rack in the lower third and preheat the oven to 450°F (230°C). 

Use a pastry brush to brush the top of the loaf with the reserved currant-soaking liquid. Bake until the loaf is golden and firm, 45 to 50 minutes; if you carefully remove it from the pan, it should feel hollow when you knock on it. Transfer the pan to a wire rack and let cool for 1 hour. 

Remove the loaf from the pan, return to the rack, and let cool completely before slicing. Stored in a paper bag or wrapped in linen at room temperature, the loaf will keep for up to 1 week. 

NOTE: As with our sourdough, you will either need to have the starter on hand or plan ahead to make it, which takes a couple of days.


I am a member of the Amazon Affiliate Program. 

Thursday, February 20, 2020

Panini Press Bread and Vegan Panini

I’ve been a fan, and customer, of Easy Tiger since it opened in Austin in 2012. And, I couldn’t have been more delighted when a second location opened closer to where I live. I routinely buy the Easy Tiger breads sold at Whole Foods with the big, levain loaf being a personal favorite. Obviously, I was thrilled to learn of the new book by David Norman, head baker and co-founder of Easy Tiger, and to receive a review copy of Bread on the Table: Recipes for Making and Enjoying Europe's Most Beloved Breads. I’ve had the pleasure of meeting David, talking a bit about bread, and comparing notes on sourdough preferences. I enjoy making a sourdough baguette while he prefers the simplicity of a baguette’s flavor without sourdough. He puts a lot of thought into the flavor and texture of different types of bread and knows of what he speaks. Full disclosure: I volunteer on the board of the Slow Food Austin chapter, and Easy Tiger has generously donated to our events in the past. In fact, one of our events is even mentioned in the book. The book traces David Norman’s journey through bread appreciation with chapters for regions he’s learned from over the years. It all began with an introduction to Swedish breads when he was a foreign-exchange student. The dramatic difference between Scandinavian breads and American-style white bread was eye-opening. He later began an incredible career in baking that has taken him to bakeries all across the US before finding his way to Texas. Each chapter highlights a place in the world and its style of bread with sample recipes followed by dishes to make using those breads. The first chapter covers French-style breads made with and without starters made with yeast and two loaves naturally fermented with levain. The Croque Monsieur recipe will make you want to make a homemade pain de mie right away. There are also chapters for Scandinavian Bread, German Bread, Italian Bread, and Bread in Central Texas. I want to get a rye sourdough starter going so I can make the Danish Rugbrod for smorrebrod and Swedish Vortbrod made with wort or porter. Of course, I want to try making the pretzels even though I can, and do, drive a few blocks for them any time I get a craving. And, the Smoked Flour Fougasse recipe, complete with instructions for smoking the flour, has me very interested. The photo of the thin, delicious-looking panini in the Italian chapter, however, is what made me bake Panini Press Bread first. 

The recipe was inspired by bread David Norman saw being used for panini in Italy. The bread used was pale, flat, and round. The loaves are underbaked just a bit so they can become crisp when pressed and grilled. The panini as described are thin with a drizzle of olive oil on the inside of the sliced bread and just a couple of slices of filling. I couldn’t wait to try them. I’d also just recently visited our brand new, artisanal, plant-based cheese shop, Rebel Cheese. I was excited to use their all-plant smoked provolone, olive mozzarella, and plant pepperoni in the panini. The bread was started the night before by making the biga which sat for 12 to 16 hours. The next day, the dough was mixed with the firm biga being added in parts so it would become incorporated more easily. The process for making the dough is not a no-knead process, but it’s a minimal-knead one. The dough was stretched and folded a few times with 15-minute rest periods in between each turn. During the first turn of stretching and folding, I added some chopped rosemary just for fun. After the last stretching and folding, it was left to ferment for 30 minutes before shaping. After dividing and resting, the dough was shaped into 12-inch rounds and left to proof. Just before sliding each loaf into the hot oven, the tops were docked for steam to escape. For oven steaming, I stick to my old method of placing a cast iron skillet on the oven floor and adding some ice just before closing the oven door with the bread in it. Once the loaves were cool, I carefully sliced them horizontally and then quartered each loaf. I used some homemade carrot top pesto to brush on the inside of each piece before adding slices of cheese and pepperoni. 

I love learning new things about making dough for bread. The stretching and folding with periods of rest was a fun process for building the dough’s structure. And, the thin loaves were perfect for crisp, tender, grilled panini. The plant-based cheeses melted surprisingly well and delivered great flavor. I can’t wait to make panini again with grilled eggplant when it’s in season. Until then, I have more bread to bake. 

Panini Press Bread
Recipe reprinted with publisher's permission from Bread on the Table: Recipes for Making and Enjoying Europe's Most Beloved Breads. 

Many types of bread, from sliced sandwich breads to rolls, can be put in a panini grill to make a toasted sandwich. Ciabatta, though popular for panini in the United States, is not my first choice for grilled sandwiches. With its crisp crust and floury surface, it is better for cold sandwiches. In Italy, I remember seeing stacks of ready-to-grill sandwiches on pale, flat round loaves of bread. This is my approximation of that bread. With a little bit of olive oil in the dough, it stays soft and flavorful, and underbaking them a little means they crisp up nicely in the grill press as the cheese melts inside and the other ingredients warm up. To use these for a sandwich, split the rounds in half horizontally, lightly drizzle with olive oil, and line with a single layer of prosciutto or pancetta followed by thin slices of a complementary cheese like fontina or provolone. Cover with the top half of the bread and grill in a panini press until the bread is well marked and crisp and the cheese is melted. 

Biga:
all-purpose flour - 90 grams or 3/4 cup 
instant yeast - 1/2 gram or pinch 
water - 45 grams or 3 tablespoons 

Put the flour and yeast in a large bowl and blend together with your fingers to evenly distribute them. Make a well in the center of the flour and add the water. 
Using your hand, draw the flour into the water, stirring and blending with your fingers. As it begins to come together, squeeze the dough with both hands to better incorporate the water into the flour. You can use a more traditional kneading action with the heel of your hand, as well, to push down and bring the biga together. This is a stiff dough, so it will take some time and a little more effort to incorporate all the flour. Add up to 15 grams (1 tablespoon) more water if you are really having trouble. 
Because this dough will ferment a long time, you do not need to develop the gluten much; just squeeze and work the dough until it is fully combined with no lumps. 
Form the dough into a ball the best you can. Return the ball to the bowl and cover with plastic wrap, or place it in a container with a lid. 
Let the biga sit at room temperature for 12 to 16 hours. 

Dough: 
all-purpose flour - 210 grams or 1 2/3 cups
salt - 6 grams or 1 teaspoon 
instant yeast - 2 grams or1/2 teaspoon 
biga - all from above 
water - 135 grams or 1/2 cup plus 1 tablespoon 
olive oil - 12 grams or 1 tablespoon 
rice flour - for dusting 

Mixing and Kneading 
Put the flour, salt, and yeast in a large bowl and blend together with your fingers to evenly distribute them. Divide the biga into three pieces and scatter them on top of the flour. 
Make a well in the center of the flour and add the water and olive oil, holding back a small amount of the water (7 grams or 11⁄2 teaspoons) until you see if the flour needs it all. Make sure you have a plastic bowl scraper at hand, then start to blend the water and biga into the flour with your hands. As the flour begins to absorb the water and the mixture starts to thicken, plunge both hands in and squeeze the dough between your thumbs and fingers. Work from the side of the bowl closest to you across to the other side, squeezing with both hands. Rotate the bowl a quarter turn and squeeze your way through the dough again.
You will feel the dough starting to come together as a more cohesive mass, and the water and starter will become more fully incorporated. Use your bowl scraper from time to time to scrape the sticky dough from the sides of the bowl into the center. Keep rotating the bowl and squeezing the dough until everything is fully incorporated, 1 to 2 minutes. It will remain a shaggy and sticky mass. 

The dough should be medium-stiff, having some give like a rubber bouncy ball. Add the reserved water if the dough is not soft enough. Add the water a little at a time, squeezing it into the dough as you have been. You may even have to add more water to get the right consistency if it still feels too stiff. It is better to have a dough that is a little wet than one that is too dry. 
Turn out the dough onto an unfloured work surface, using the bowl scraper to get it all out of the bowl, and scraping as much off your hands as you can. Resist the urge to add flour to the work surface or the dough at this stage. Starting with the edge closest to you, grab the dough with both hands, palms down, and pull it gently toward you. Stretch it up and flip it over the top of the dough mass by 2 or 3 inches and press it into the surface. Grab the new edge closest to you and stretch it gently up and flip it over the top. Repeat this stretching and folding of the dough four or five times, working your way to the far side of the mass. The stretches should be gentle enough not to tear the dough apart. As you continue this process, the dough will hold together better and be easier to stretch. 
Scrape up the dough with a dough scraper, rotate it a quarter turn, and repeat the stretching and flipping through the dough mass four or five times, 3 to 5 minutes. With each stretch and flip through the dough, you will feel it developing, becoming more cohesive and less sticky. When most of the dough holds together and pulls off the work surface as you stretch it, slide the dough scraper under it and gather it into a ball. The dough will not be fully developed yet and will still be a little sticky. 
Cup your hands around the bottom of the far side of the ball and pull it gently toward you, allowing the dough to grip the work surface, then move your hands to the left, rotating the dough counterclockwise. Return your hands behind the dough and pull and rotate again one or two times. This will tighten the surface and help shape the dough into a smooth ball. Return the ball to the bowl with the smooth side up and let it rest for 1 minutes. 
Dust your work surface lightly with all-purpose flour and turn out the dough so that the smooth side is down. Gently press out the dough to flatten it into a round about 2 inches thick. Grab the edge closest to you and stretch it up and over the top of the dough, about two-thirds of the way to the opposite side, and press into the surface. Grab the edge opposite you and stretch and fold it toward you over the first fold, about two-thirds of the way to the closest edge, and press into the surface. 
Rotate the dough a quarter turn and repeat two more folds, one away from you and one toward you. Turn the dough over so the seam side is down. Form a ball by cupping your hands around the bottom of the far side of the dough and pulling toward you, rotating the dough counterclockwise. Repeat one or two times to form a ball. You will notice that the dough is more developed and will stretch tighter than before. Be careful not to stretch too tight; if the surface starts to tear, stop tightening. Return the ball to the bowl, smooth side up, and let rest for 15 minutes. 
Repeat this stretching and folding three times at 15-minute intervals for a total of four folds over an hour. This will develop into a smooth, elastic dough with a good gluten network. 

Fermentation
After the final fold, return the ball to the bowl, smooth side up, cover with a tea towel or plastic wrap, and let sit in a warm, draft-free place until the dough has doubled in volume and feels airy when gently touched, about 30 minutes. 

Shaping 
Preheat the oven to 475ºF with the baking stone and steaming pan in place. 
Dust the work surface lightly with all-purpose flour and turn out the dough so the smooth side is down. Divide the dough into two equal pieces with a bench knife or bowl scraper. Gently press one piece of the dough to flatten it into a round about 2 inches thick. Grab the edge opposite you and stretch it up and over the top of the dough, about two-thirds of the way toward you. Gently press into the surface with the heel of your hand. Rotate the dough a quarter turn and grab the edge opposite you, stretching and folding it over the first fold, about two-thirds of the way toward you, pressing it gently. Repeat two or three times until you have a loose ball shape, then turn the ball over so the seam side is down. 
Cup your hands behind the ball with your pinkie fingers and the sides of your hands on the table, then gently pull your hands toward you. At the same time as you are gently pulling, move your hands to the left, causing the ball to rotate counterclockwise about a quarter turn. The dough should grip the table and the surface will tighten. Move your hands behind the ball again, pulling gently and rotating the ball. Set aside and cover with a tea towel, repeating with the second piece of dough. Let the dough rest for 15 to 20 minutes so the gluten relaxes a bit. 
When the pieces have rested, dust a cutting board lightly with all-purpose flour or line a baking sheet with parchment paper and dust it lightly with flour. 
Dust the work surface again with all-purpose flour. Flatten one ball on the work surface with your hand and use a rolling pin to roll into a 12-inch circle, always starting in the center and rolling outward in all directions. Bring the pin back to the center with each stroke and use plenty of all-purpose flour so the dough does not stick to the pin or work surface. Transfer the circle carefully to the floured board or parchment. Repeat with the second piece of dough. 

Proofing 
Cover the circles with tea towels and let rise in a warm, draft-free place, about 30 minutes. 

Baking 
Dust the peel with rice flour (see page 17) and transfer one of the loaves onto the peel with the seam side down. 
Dock the surface of the dough with a roller docker if you have one or a notched rolling pin, or use the blunt end of a wooden skewer or even a chopstick to poke holes in the top to let out steam. 
Using a funnel, steam the oven with about 60 grams (1⁄4 cup) of water. 
Open the oven and place the tip of the peel on the center of the baking stone. Quickly pull the peel out from under the loaf, letting it gently drop onto the baking stone, leaving room for the second loaf if the stone is large enough; center the loaf if it is not. Close the oven door immediately. If your stone can fit two loaves at once, quickly dock the second loaf and slide it onto the stone. 
Using the funnel, add 60 grams (1⁄4 cup) more water to the steaming pan (less water than larger loaves). Close the door tightly as soon as the water hits the steaming pan. Lower the oven to 425ºF. 
After about 10 minutes, check the bread. The top should still be pale, while the bottom will just be starting to color and the crust will be set. 
Cool the bread on a wire cooling rack until completely cool.


I am a member of the Amazon Affiliate Program. 

Tuesday, September 3, 2019

Brioche

As a long-time fan of Martha Stewart, when she raves about a cookbook I pay attention. I noticed on Instagram that she had mentioned Baking at République: Masterful Techniques and Recipes by Margarita Manzke a couple of times. Specifically, she mentioned baking the brioche from this book and how delicious it is. Naturally, upon receiving a review copy of the book, I had to try the brioche. There are chapters devoted to some of the basic recipes that are used for several types of baked goods. Brioche is the first, and after the master recipe for brioche dough, there are several examples of how to use it including Brioche Fruit Tarts, Brioche Bread Pudding, Cardamom Sticky Buns, and more. Other chapters offer master recipes for Pain au Lait, Croissants, Kouign Amanns, Pate Sucree, Pate Brisee, and Pate a Choux. And, there are delightfully decadent recipes for using all of those types of dough. Following those chapters are ones for Muffins and Scones, Cookies and Bars, Cakes, Custards Puddings and Cream, and Basic Components. The Chocolate-Hazelnut Paris-Brest, Creme Brulee Cheesecake Tarts, and Mini-Chocolate Bundt Cakes all nearly distracted me from my intent to make the brioche first. But, I stayed on track. Now, in the days prior to tackling the brioche recipe, my trusty stand mixer of about 18 years had started acting a little funny. It didn’t seem to like operating at the lowest speed, but it was working at all the higher speeds. I was sure I could get through the dough making for this recipe by avoiding the lowest speed and working with the weirdness. Onward I went with letting a pound of butter warm a bit out of the refrigerator, cracking nine eggs, and getting the milk and locally-milled flour ready to go. And, the mixing got off to an ok start, but as soon as the dough became a bit heavy with the flour my mixer just stopped working at any speed. I was completely offended. How could it do this to me after all these years? How did it know I had all these ingredients ready to be used for a big batch of sticky, messy dough that really, really would be best made with a mixer? I didn’t seriously consider throwing out all the butter and eggs for even a moment. Instead, I started devising a plan for mixing all that butter in by hand without getting the butter too warm from my hands. Did I mention this was a big batch of sticky, messy dough? My kneading method involved using a bench scraper in one hand while turning and kneading with the other hand. After a few turns, I scooped it all into a bowl and refrigerated it for a bit before repeating. I wasn’t at all sure that this would turn into any kind of edible bread, but I was going to bake whatever became of it. 

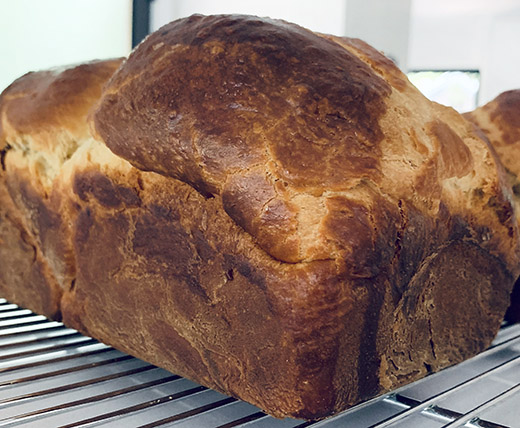
It wasn’t particularly helpful to be reminded by others that we didn’t always have mixers. There must have been a time when this dough was made by hand. After everything was mixed, more or less, the dough was left to rise for 30 minutes before being turned and left for another 30 minutes. After the second rise, it was refrigerated overnight. I really believe the slow, cold rise overnight saved the dough. It was a smoother, lovelier dough the next day. To make the loaves, the dough was divided into four pieces, two dough balls were placed in each of two loaf pans, and they were left to rise again for about an hour and a half. After being brushed with an egg wash, the loaves were baked until deeply browned. 

Amazingly, the result was outstanding. Tender, buttery loaves were delicious sliced and served with blueberry jam. I also made very thick-cut French toast inspired by the book. I still have the second loaf in the freezer awaiting an occasion for a savory French toast with slow-roasted tomatoes. My old mixer and I have since parted ways after learning that a repair was unlikely, and a newer model has taken its place in the kitchen. I have lots of recipes to try with it!

I am a member of the Amazon Affiliate Program. 

Monday, September 10, 2018

Fruit Sourdough

If I were lucky enough to be visiting Melbourne, Tivoli Road Bakery is exactly the kind of place I’d want to find while out for a stroll. Michael and Pippa James’ bakery was built on their relationships with farmers and suppliers while finding the best ingredients, and it was built on excellent baking, of course. The book The Tivoli Road Baker: Recipes and Notes from a Chef Who Chose Baking, of which I received a review copy, tells the whole story. Descriptions of ingredients and suppliers are interspersed throughout the pages of recipes making clear the bakery’s goal of using the best in terms of flavor, sustainability, and cultural identity. One story highlights work being done to learn how early indigenous Australians harvested grain and made bread, and another explains the methods of a biodynamic farm. I was sold on the philosophy and then became a bigger fan as I read about the types of sourdough bread they bake. There are complete instructions for creating and maintaining a sourdough starter and step-by-step guides for each stage of dough mixing, shaping, and baking. I was intrigued by the Olive Loaf made not just with a mix of green and black olives marinated with herbs but also with tapenade incorporated into the dough. The Wholegrain Rye and Buttermilk Loaf looks delicious on its own and as the base of an open-faced, cured salmon sandwich. In fact, there’s a chapter of Sandwiches for inspiration for all the breads and Salads to go with them. There are also chapters for Viennoiserie, Pastry, Seasonal treats, and British Bakes. After mastering the Croissant Pastry, there are several recipes for using it like the incredible Morning Buns with vanilla custard. Some other recipes that I’d love to try include the jam-filled Lamington Doughnuts, the gluten-free mini Pear Almond and Brown Butter Bundt Cakes, and the loaf-pan baked Pistachio Cake. While reading the book, I pulled my sourdough starter from the refrigerator to feed it and get it ready to go to work. I had to try the Fruit Sourdough first. It’s a bread loaf with almost as much jewel-toned dried fruits as bread in each slice. 

As always with sourdough, I had to get my starter back into shape first. I store it in the refrigerator and let it go dormant between baking projects. I feed it in incrementally bigger portions for three feedings one day before I intend to use it. For this bread, the dried fruit needed to be soaked overnight before beginning. Also, all of the sourdough breads in this book begin with a starter build that’s mixed four to six hours before being added to the dough. For the fruit, golden raisins, currants, black raisins, pitted and halved dates, stemmed and quartered figs, and some ground ginger were measured and placed in a bowl. In a saucepan, a cinnamon stick, a star anise, and some water were combined. Red wine was to be added, but I used white wine instead since that seemed less wintry. The mixture was brought to a boil and then left to steep off the heat for 10 minutes. After steeping, the mixture was strained over the dried fruit, and it was left to soak overnight. The starter build was made with sourdough starter, bread flour, whole wheat flour, and water. The dough was started with bread flour, whole wheat flour, rye flour, and water and was left for the autolyse for about 30 minutes. Then, the starter build and salt were added, and the dough was mixed and left in a large bowl before the folds began. Before the first turn and fold in the bowl, the soaked fruit along with some chopped dried apricots were added. The fruit-filled dough was then turned and folded every 30 to 45 minutes a total of four times. Next, the dough was pre-shaped and left to rest for 20 minutes, and then it was shaped for the loaf pan. There are complete instructions for all of these steps in the book. I left the dough in the loaf pan in the refrigerator overnight before baking. And to bake, my preferred method for steam in the oven is to place some ice cubes in a cast iron skillet that sits on the oven floor for the first 15 minutes or so of the baking time. The loaf baked until golden and crusty on top. 


This was a somewhat wet and sticky dough that resulted in a tender crumb around all of that fruit. As noted in the book, all this bread needs for serving is a little butter. It was fruity and sweet with no added sugar, and it went perfectly with some afternoon tea. Melbourne is lucky to have this bakery that’s building strong ties in their food community, and I’m lucky to have their recipes.


I am a member of the Amazon Affiliate Program. 

Thursday, June 7, 2018

Edamame Pate Sandwiches with Molasses Oat Bread

I’m trying to remember my first encounter with hippie food. I know that I’d eaten whole wheat bread and home-grown vegetables my whole life, but my first memory of eating food that was created as a countercultural statement was when I was a student at the University of Illinois. There was a little, vegetarian cafe in Urbana called Nature’s Table, and I fell for their garbanzo spread sandwich on whole grain bread. I hadn’t thought about that place in years, but it came back to me as I read a review copy of Hippie Food: How Back-to-the-Landers, Longhairs, and Revolutionaries Changed the Way We Eat. This book looks back at the origins of what we’ve come to call “hippie food” and how many products that used to be hidden away in health food stores became mainstream. It all might have started in the 1950s in California where optimum health and trust in nature became linked to food choices. Soon thereafter, interest in macrobiotic diets were on the rise and a demand for organically-grown brown rice developed. At first, there weren’t always scientific reasons to back up various nutritional claims, but the idea that food grown without harsh chemicals is better for people and the planet began to resonate in health food circles. Just when industrialized farming was taking off, this nascent call for doing things the old-fashioned way arrived. It was interesting to read how the Lundberg family in California became a leader in growing rice organically. Following the interest in brown rice came the return to whole wheat. White bread became a symbol of the industrial, over-commercialized food system. Recipes for baking whole wheat bread at home began circulating. All the while, more health food stores and cafes cropped up around the country. Health food buying coops appeared as well, and I was interested to read about the start of Austin’s own Wheatsville Coop that is still in business today. Speaking of Austin, all of this also led to Whole Foods Market that started here as well. Hippie food often has a negative connotation as bland or boring in its meatlessness, but it’s come a long way. I’m so glad ingredients like all sorts of whole grain flours, brown rice, and organic produce have gained popularity and can be found everywhere. And, I’m thrilled that we now have so many cookbooks and magazines to inspire delicious ways to use those ingredients. This book and memories of Nature’s Table had me craving a vegetarian sandwich on whole grain bread. I’d just seen the Edamame Pate Sandwich in Clean Eating, and I decided to bake my own bread for it. 

When I read A New Way to Bake, I had marked the page for Molasses Oat Bread, and this was a perfect use for it. It’s an easy bread to make too. Boiling water was poured over some oats, and molasses was added. While it sat, more oats were coarsely ground in a food processor and then added to a bowl with whole wheat flour, bread flour, dry milk, and salt. Yeast was added to the oat-molasses mixture before it was combined with the flour mixture. The dough was kneaded and left to rise before being shaped and left to rise again. Before baking, the loaf was scored, brushed with egg white, and topped with oats. For the edamame pate, thawed shelled edamame were pureed with walnuts, mint, green onion, salt, lemon juice, and a little water. I made a few different sandwiches. Some were made with pea sprouts, some had home-grown arugula, and some were open-faced with just tomato. 

The molasses oat bread was a fitting and delicious vehicle for the edamame pate. It’s been too long since I last had that vegetarian sandwich at Nature’s Table, so I would be able to compare the two. But, I do know that Nature’s Table wasn’t using fresh, local tomatoes on their sandwiches back then, and that gave my edamame sandwich a big boost. Is this modern hippie food? Evolved hippie food? Whatever the label for this kind of eating, I hope the concept continues. 

I am a member of the Amazon Affiliate Program. 

Sunday, January 15, 2017

Za’atar Twists

Bread baking books get me every time. I always want to jump in and bake everything. It was no different with Breaking Breads: A New World of Israeli Baking--Flatbreads, Stuffed Breads, Challahs, Cookies, and the Legendary Chocolate Babka by Uri Scheft, and I received a review copy. He brings an international perspective to his baking as an Israeli who has worked in Denmark, Italy, and France and has learned from Moroccan, Yemenite, and Turkish family and friends. He opened his own bakery, Lehamim Bakery which means “breads” bakery, in Tel Aviv in 2002, and expanded the business by opening Breads Bakery in New York City in 2013. His babka is famous, and the various recipes for that dough in the book all look delicious. There are careful instructions for filling, rolling, twisting, and shaping all the different flavors and types of loaves. And, the chapter for Challah shows some beautiful creativity. The dough is fashioned into braided, twisted, and stacked shapes, and there are even some loaves with cups baked into them for holding dipping sauces. The Black Tie Challah has a small braid covered in black sesame seeds along the length, on top of the larger braided loaf. Some of the flavors of challah include Chocolate and Orange Confit Challah, Marzipan Challah, and Sticky Pull-Apart Cinnamon Challah Braid. It’s inspiring to see a basic bread recipe taken in so many directions, and the reader is encouraged to experiment and try whatever shapes you fancy. Other breads include Brioche, Ciabatta, Pan de Mie, and an incredible Dill Bread that’s formed into a coil and snipped with scissors to make a flower shape before baking. There are cookies in the book too. I have the page marked for Chocolate-Dipped Vanilla Krembos which are made with a coconut macaroon base topped with a stable meringue that gets dipped into chocolate. I also marked the page for Parmesan Cookies that are a slice-and-bake savory snack with sesame seeds on the outside edge. Before baking those cookies, I had to try the Za’atar Twists first. 

The twists are made with babka dough, and there is a Basic Babka Dough recipe and an Advanced Babka Dough recipe. Both start the same way with a rich dough made with eggs and butter. The advanced version becomes even richer with a process of layering in more butter in the way puff pastry is made. I opted for the leaner, basic option here. The dough was mixed and then left to chill in the refrigerator for at least an hour before proceeding with the rest of the recipe. These savory twists are filled with a buffet of delicious things. And, now that I look more closely at a photo in the book, I realize that I probably left my filling a bit too chunky. In the photo, it appears that the feta was very finely crumbled to make a smoother, flatter layer. After the dough chilled, it was rolled out into a large rectangle. Labne was spread across the surface followed by finely chopped fresno chiles, a drizzle of olive oil, crumbled feta, toasted sesame seeds and pine nuts, chopped fresh oregano, and za’atar. I was delighted to find my oregano plants hadn’t been affected by our below freezing weather, and I was able to harvest plenty for the whole cup of leaves needed. The dough was then cut horizontally to make two long pieces. Each piece was rolled up as tightly as possible the same way cinnamon rolls are made. Then, each roll was pulled to tighten and lengthen. The rolls each ended up about 35 inches long. Those long rolls were then cut in half along the length and then cut crosswise to make seven pieces from each of the four long strips. Those cut strips were then joined in pairs and twisted. The twists were left to proof for a few hours before being brushed with egg wash and baked. 

My twists are a bit less tidy than the ones pictured in the book since my filling wasn’t quite as smooth. But, as the author points out, no matter how your results look, they will taste great—and they did. These are kind of a meal unto themselves due to all the flavor from the feta, oregano, and za’atar and the added texture from the nuts and seeds. And, the dough was a lot of fun to work with and form into twists. As always with bread books, I’m going to be baking more things from this.  

Za’atar Twists 
Excerpted with publisher's permission from Breaking Breads by Uri Scheft (Artisan Books). Copyright 2016. 

Makes 14 twists 

A savory babka? And why not? I got the idea to make a za’atar babka when I was making a za’atar-seasoned bread. To fill the babka, I use labne, which is ultra-rich strained yogurt that has a wonderfully creamy texture and tangy flavor—not unlike sour cream. Chiles, feta cheese, and pine nuts add to the savory appeal. Here you take the babka dough and instead of twisting it and placing it in a loaf pan, you bake it free-form for individual twists or sticks. (You can follow the twist-shaping method for just about any of the babkas—some of the filling may ooze out onto the sheet pan, but those crispy bits are often the best.) 

Sesame seeds 30 grams (3 tablespoons) 
1 recipe Basic Babka Dough, chilled 24 hours 
All-purpose flour - for rolling and shaping 
Labne - 400 grams (11/3 cups) 
Red jalapeno or Fresno chile - 1, finely chopped (seeded for less heat) 
Extra-virgin olive oil - 20 grams (1 tablespoon plus 1 teaspoon), plus extra for finishing 
Feta cheese - 110 grams (1 cup), crumbled 
Pine nuts - 60 grams (1/2 cup) 
Fresh oregano leaves 50 grams (1 cup) 
Za’atar - 25 grams (2 1/2 tablespoons), plus extra for finishing 
Egg Wash Large egg - 1 
Water - 1 tablespoon 
Fine salt - Pinch 

1. Toast the sesame seeds: Place the sesame seeds in a small skillet over medium-high heat and toast them, shaking the pan often, until they are golden brown, 2 to 3 minutes. Transfer the seeds to a small plate and set aside. 

2. Roll the cold babka dough: Unwrap the cold babka dough and set it on a lightly floured work surface. Roll the dough into a 12-by-28-inch rectangle (it should be just a little shy of ¼ inch thick) with a long side facing you. Pull and shape the corners into a rectangle. 

 3. Fill and roll the dough: Spread the labne over the dough in a thin, even layer. Sprinkle it with the jalapeño, olive oil, feta, toasted sesame seeds, pine nuts, oregano, and za’atar. Divide the dough in half horizontally so you now have two 6-by-28-inch pieces. Working from the long bottom edge of one of the pieces, roll the dough up into a tight cylinder, pushing back on the cylinder with each roll to make it even tighter. Lift the cylinder, holding one end in each hand, and gently stretch and pull to tighten it even more (it will stretch to about 35 inches long). Repeat with the second piece of dough. 

4. Divide the dough into strips and make the twists: Use a bread knife to slice each cylinder in half lengthwise so you have 4 long pieces, and then slice those pieces crosswise into 7 equal sections (about 5 inches each) to make a total of 28 strips. Cross 2 equal-size pieces to create an X, keeping the exposed filling facing up. Twist the ends together like the threads on a screw so you have at least 1 twist on each side of the X (3 twists total). Repeat with the remaining pieces. Set 7 twists on one parchment paper–lined rimmed sheet pan and 7 twists on a second parchment paper–lined sheet pan. 

5. Let the twists proof: Cover the sheet pans with plastic wrap and set aside in a warm, draft-free spot until the twists have doubled in volume and are very soft and jiggly to the touch, 2 to 3 hours, depending on how warm your room is. 

6. Preheat the oven to 350°F. 

7. Bake the twists: Make the egg wash by whisking the egg, water, and salt together in a small bowl. Brush egg wash over each twist, and bake until they are dark brown and baked through, about 20 minutes; check the twists after 15 minutes, and if they are getting too dark, tent them loosely with a piece of parchment paper. Remove the twists from the oven and, while they are still warm, brush with more olive oil and sprinkle with a little za’atar. Serve warm or at room temperature. 

Basic Babka Dough 

Whole milk (at room temperature) - 120 grams (1/2 cup) 
Fresh yeast - 20 grams (2 1/2 tablespoons) or active dry yeast - 6 grams (2 teaspoons) 
All-purpose flour (sifted, 11.7%) - 280 grams (2 1/4 cups), plus extra for dusting and kneading 
Pastry or cake flour (sifted, 8.5 to 9%) - 220 grams (2 cups plus 2 tablespoons) 
Large eggs - 2 Granulated sugar - 75 grams (1/3 cup) 
Fine salt - Large pinch 
Unsalted butter (at room temperature) - 80 grams (5 tablespoons plus 1 teaspoon) 

1. Make the dough: Whisk the vanilla into the milk in the bowl of a stand mixer fitted with the dough hook. Use a fork or your fingers to lightly mix the yeast into the milk. Then, in this order, add the flours, eggs, sugar, salt, and finally the butter in small pinches. 

2. Mix on the lowest speed, stopping the mixer to scrape down the sides and bottom of the bowl as needed, and to pull the dough off the hook as it accumulates there and break it apart so it mixes evenly, until the dough is well combined, about 2 minutes. If the dough is very dry, add more milk, 1 tablespoon at a time; if the dough looks wet, add more all-purpose flour, 1 table-spoon at a time, until the dough comes together. Increase the mixer speed to medium, and mix until the dough is smooth and has good elasticity, 4 minutes. 

3. Stretch and fold the dough: Lightly dust your work surface with flour and turn the dough out on top; lightly dust the top of the dough and the interior of a large bowl with flour. Grab the top portion of the dough and stretch it away from you, tearing the dough. Then fold it on top of the middle of the dough. Give the dough a quarter turn and repeat the stretch, tear, and fold. Continue to do this until you can stretch a small piece of dough very thin without it tearing, about 5 minutes. Then use your hands to push and pull the dough against the work surface and in a circular motion to create a nice round of dough. Set the ball in the floured bowl, cover the bowl with plastic wrap, and set it aside at room temperature for 30 minutes. 

4. Chill the dough: Set the dough on a piece of plastic wrap and press it into a 1-inch-thick rectangle. Wrap the dough in plastic wrap and refrigerate it for at least 1 hour or up to 24 hours.

I am a member of the Amazon Affiliate Program. 

Blogging tips