
You know I don’t play favorites with my cookbooks. But still. Even though I love them all equally, there are some that are a little bit special. Flour by Joanne Chang is one of those. So, needless to say, I was excited about her new book, Flour, Too, which was just released and of which I received a review copy. While the first book included all the baking recipes from her Flour bakeries and cafes in Boston, the new one shares the savory side of the menus with a few more sweets as well. As I read through the Soups section of the Lunch chapter, it occurred to me that I didn’t realize I like soup so much. Based on Chang’s descriptions, I wanted to try all of these soups. There’s a pureed Eggplant Parmesan soup made with tomatoes and fresh basil that made me want to run to the farmers' market for the ingredients. And, I already tried the Chilled Spanish White Gazpacho with green grapes, blanched almonds, and cucumbers. It’s a lovely chilled soup for summer with a drizzle of olive oil and maybe a few drops of aged Sherry vinegar on top. Next, both breakfast and lunch sandwiches made me hungry with options like Flour’s Famous Egg Sandwich on homemade focaccia rolls; Lemony Hummus with Cucumber, Radish Sprouts, and Red Onion; and Grilled Tofu with Olive Tapenade and Roasted Vegetables. There are also salads, mains, snacks, drinks, desserts, and breakfast sweets. Chang’s attention to detail is just as evident here as it was in the first book as the story of each dish is revealed. Everything on the menu was tested, tweaked, and perfected for serving with the best ingredients for each season.
Apparently, when the first book came out, regular Flour customers were disappointed that it didn’t include the recipe for Cinnamon-Cream Brioche. At the bakery, the small quantity made each day sells out quickly, and everyone wanted to try making them at home. So, the recipe was included in Flour, Too. A rich brioche dough was made, and you can either make half the recipe provided or just make the whole amount as I did and bake one loaf of brioche with the extra dough. The other half of that dough was divided into eight portions which were stretched into little round pizza shapes with a thicker edge and thinner middle. Pastry cream, which can be made in advance and kept chilled, was spooned into the center of each dough round. The pastry cream was topped by creme fraiche. The pastries were then sprinkled with cinnamon sugar before going into the oven for about 30 minutes. The pastry cream and creme fraiche did spread and run over the brioche edges, but it’s no cause for concern. There was still plenty of delicious cinnamon-sugared cream in each pastry. They’re delightful all by themselves, but since we had fresh, local berries on hand, I used them for garnish.
by Joanne Chang is one of those. So, needless to say, I was excited about her new book, Flour, Too, which was just released and of which I received a review copy. While the first book included all the baking recipes from her Flour bakeries and cafes in Boston, the new one shares the savory side of the menus with a few more sweets as well. As I read through the Soups section of the Lunch chapter, it occurred to me that I didn’t realize I like soup so much. Based on Chang’s descriptions, I wanted to try all of these soups. There’s a pureed Eggplant Parmesan soup made with tomatoes and fresh basil that made me want to run to the farmers' market for the ingredients. And, I already tried the Chilled Spanish White Gazpacho with green grapes, blanched almonds, and cucumbers. It’s a lovely chilled soup for summer with a drizzle of olive oil and maybe a few drops of aged Sherry vinegar on top. Next, both breakfast and lunch sandwiches made me hungry with options like Flour’s Famous Egg Sandwich on homemade focaccia rolls; Lemony Hummus with Cucumber, Radish Sprouts, and Red Onion; and Grilled Tofu with Olive Tapenade and Roasted Vegetables. There are also salads, mains, snacks, drinks, desserts, and breakfast sweets. Chang’s attention to detail is just as evident here as it was in the first book as the story of each dish is revealed. Everything on the menu was tested, tweaked, and perfected for serving with the best ingredients for each season.
Apparently, when the first book came out, regular Flour customers were disappointed that it didn’t include the recipe for Cinnamon-Cream Brioche. At the bakery, the small quantity made each day sells out quickly, and everyone wanted to try making them at home. So, the recipe was included in Flour, Too. A rich brioche dough was made, and you can either make half the recipe provided or just make the whole amount as I did and bake one loaf of brioche with the extra dough. The other half of that dough was divided into eight portions which were stretched into little round pizza shapes with a thicker edge and thinner middle. Pastry cream, which can be made in advance and kept chilled, was spooned into the center of each dough round. The pastry cream was topped by creme fraiche. The pastries were then sprinkled with cinnamon sugar before going into the oven for about 30 minutes. The pastry cream and creme fraiche did spread and run over the brioche edges, but it’s no cause for concern. There was still plenty of delicious cinnamon-sugared cream in each pastry. They’re delightful all by themselves, but since we had fresh, local berries on hand, I used them for garnish.

Kurt would love it if my next stop in the book is the Boston Cream Pie with its four layers of sponge cake brushed with coffee syrup and stacked with thick layers of diplomat cream. I’d like to try the Cantaloupe-Mint Seltzer, Scallion Pancakes, and Summer Three-Bean and Potato Salad with Fresh Herbs. I’ll eventually get to all of that and more. Just don’t tell my other cookbooks about that “special” category I mentioned.
Cinnamon–Cream Brioche
Recipes reprinted with publisher’s permission from Flour, Too.
We only make a few of these each morning, and as soon as they come out of the oven, they are snatched up by waiting customers. When the first Flour book came out, there was an outcry from these loyal cinnamon-cream devotees because the recipe was not included. It wasn’t an intentional omission; in my mind, this pastry was something we kind of threw together each morning and thus it didn’t really need a recipe. Clearly I was wrong. We were inspired by a recipe for a similar pastry in Nancy Silverton’s book, Pastries from the La Brea Bakery, called Viennese Cream Brioche, which she describes as being so sublime that it made Julia Child cry. With that description, how could we resist trying our hand at making them? The recipe uses ingredients that we always have in our fridge—brioche dough, pastry cream, crème fraîche—and puts them together in a way that makes quite an addictive treat. Be generous with the cinnamon-sugar that is showered on top; it’s what makes these so crunchy and irresistible.
Makes 8 pastries
1/2 batch Basic Brioche dough (see separate recipe)
1 cup/240 ml Pastry Cream (see separate recipe)
1 1/2 cups/360 ml creme fraiche
1 1/4 cups/250 g granulated sugar
1 tsp ground cinnamon
Special equipment: two rimmed baking sheets, parchment paper
1. Preheat the oven to 350°F/180°C, and place one rack in the center and one rack in the top third of the oven. Line the baking sheets with parchment paper.
2. Shape the brioche dough into a rectangle about 8 in/20 cm long, 4 in/10 cm wide, and 1 in/2.5 cm thick. Using a ruler and a knife, cut the rectangle into eight 2-in/5-cm squares by first dividing it in half horizontally and then dividing it vertically into strips 2 in/5 cm wide. Each square of dough should weigh about 3 1⁄2 oz/100 g.
3. Stretch each dough square into a circle about 5 in/12 cm in diameter as if you are making a small pizza. Stretch the inner part of the circle so that it is quite thin and shape the edge of the circle to create a rim. The center should be almost paper-thin and the finished circle should look like you are making the crust for a mini deep-dish pizza. Place the brioche circle on one of the prepared baking sheets and repeat with the remaining dough squares, spacing them 2 to 3 in/5 to 7.5 cm apart and using both baking sheets.
4. Using the back of a spoon, spread 2 tbsp of the pastry cream over the base of each brioche circle, spreading it evenly and leaving the rim bare. Place about 3 tbsp of the creme fraiche in the center of each brioche circle and gently spread it, again covering the base of the circle and leaving the rim untouched. In a small bowl, mix together the sugar and cinnamon, then sprinkle the mixture evenly over both the creme fraiche center and the rim of each circle.
5. Bake the pastries, switching the baking sheets between the racks and rotating them back to front about halfway during baking, for 25 to 30 minutes, or until they are medium golden brown along the edge. (Sometimes the creme fraiche spills out over the edge of the circle. Don’t fret; when the pastries come out of the oven and cool a bit, you can scoop spillover back into the center.) Let the creme fraiche set and the brioche cool on the baking sheets for 10 to 15 minutes before serving. Cinnamon-creams should be served the day they are made; they don’t hold very well overnight because of their creamy centers.
Basic Brioche
Makes about 3 1/4 lb/1.5 kg, enough for 2 loaves
2 1/4 cups/315 g all-purpose flour
2 1/4 cups/340 g bread flour
3 1/4 tsp active dry yeast, or 1 oz/30 g fresh cake yeast
1⁄3 cup plus 1 tbsp/80 g granulated sugar
1 tbsp kosher salt
5 large eggs, plus 1 large egg for the egg wash if making loaves
1 cup plus 6 tbsp/310 g unsalted butter, at room temperature, cut into 10 to 12 pieces
Special equipment: stand mixer with dough hook attachment, two 9-by-5-in/23-by-12-cm loaf pans if making loaves, parchment paper if making loaves (optional)
1. Using the stand mixer, combine the all-purpose flour, bread flour, yeast, sugar, salt, 5 eggs, and 1⁄2 cup/120 ml water and beat on low speed for 3 to 4 minutes, or until all of the ingredients have come together. Stop the mixer as needed to scrape the sides and bottom of the bowl to make sure all of the flour has been incorporated into the wet ingredients. Once the dough has come together, beat on low speed for 3 to 4 minutes longer. The dough will be stiff and seem quite dry.
2. Still on low speed, add the butter, one piece at a time, mixing after each addition until it disappears into the dough. After all of the butter has been added, continue mixing on low speed, stopping the mixer occasionally to scrape the sides and bottom of the bowl, for about 10 minutes. It is important to mix all of the butter thoroughly into the dough. If necessary, break up the dough with your hands to help incorporate the butter.
3. Once the butter has been completely incorporated, increase the mixer speed to medium and beat for another 15 minutes, or until the dough becomes sticky, soft, and somewhat shiny. It will take some time for it to come together; it will look very shaggy and questionable at the start but in time will turn smooth and silky. When that happens, increase the speed to mediumhigh and beat for about 1 minute. You should hear the dough make a slap-slap-slap sound as it hits the sides of the bowl. Test the dough by pulling at it; it should stretch a bit and have a little give. (If it seems wet and loose and more like a batter than a dough, add 2 to 3 tbsp flour and mix until it comes together.) If it breaks off into pieces when you pull at it, continue to mix on medium speed for another 2 to 3 minutes, or until it develops more strength and stretches when you grab it. It is ready when you can gather it all together and pick it up in one piece.
4. Transfer the dough to a large bowl or plastic container and cover it with plastic wrap, pressing the wrap directly onto the surface of the dough. Let the dough proof (that is, expand and develop flavor) in the refrigerator for at least 6 hours or up to overnight. (At this point the dough may be frozen in an airtight container for up to 1 week. Thaw overnight in the refrigerator before using.) If you are making a brioche treat, proceed as directed in the individual recipe.
5. Line the bottom and sides of the loaf pans with parchment paper, or butter the pans liberally.
6. Divide the dough in half, and press each half into about a 9-in/23-cm square. (The dough will feel like cold, clammy Play-Doh.) Facing the square, fold down the top one-third toward you, and then fold up the bottom one-third, as if folding a business letter. Press to join the three layers. Turn the folded dough over and place it, seam-side down, into one of the prepared pans. Repeat with the second piece of dough, placing it in the second prepared pan.
7. Cover the loaves lightly with plastic wrap and place in a warm (78° to 82°F/25° to 27°C) area to proof for 4 to 5 hours, or until the loaves have nearly doubled in size. They should have risen to the rim of the pan and have a rounded top. When you poke at the dough, it should feel soft, pillowy, and light, as if it were filled with air—because it is! The loaves have finished proofing and are filled with yeast air pockets. At this point, the texture of the loaves always reminds me a bit of how it feels to touch a water balloon.
8. Preheat the oven to 350°F/180°C, and place a rack in the center of the oven.
9. In a small bowl, whisk the remaining egg until blended. Gently brush the tops of the loaves with the beaten egg. Bake for 35 to 45 minutes, or until the tops and sides of the loaves are completely golden brown. Let cool in the pans on wire racks for 30 minutes, then turn the loaves out of the pans and serve warm or continue to cool on the racks. The bread can be stored tightly wrapped in plastic wrap at room temperature for up to 3 days (if it is older than 3 days, try toasting it) or in the freezer for up to 1 month.
Pastry Cream
Makes about 1 3/4 cups/420 ml
1 1/4 cups/300 g milk
1/2 cup/100 g granulated sugar
1/4 cup/30 g cake flour
1/2 tsp kosher salt
4 egg yolks
1 tsp vanilla extract
Special equipment: sieve
1. In a medium saucepan, heat the milk over medium-high heat until scalded; that is, until small bubbles form along the sides of the pan. While the milk is heating, in a small bowl, stir together the sugar, flour, and salt. (Mixing the flour with the sugar will prevent the flour from clumping when you add it to the egg yolks.) In a medium bowl, whisk the egg yolks until blended, then slowly whisk in the flour mixture. The mixture will be thick and pasty.
2. Remove the milk from the heat and slowly add it to the egg-flour mixture, a little at a time, while whisking constantly. When all of the milk has been incorporated, return the contents of the bowl to the saucepan and heat over medium heat, whisk continuously and vigorously, for about 3 minutes, or until the mixture thickens and comes to a boil. At first, the mixture will be very frothy and liquid; as it cooks longer, it will slowly start to thicken until the frothy bubbles disappear and it becomes more viscous. Once it thickens, stop whisking every few seconds to see if the mixture has come to a boil. If it has not, keep whisking vigorously. As soon as you see it bubbling, immediately go back to whisking for just 10 seconds, and then remove the pan from the heat. Boiling the mixture will thicken it and cook out the flour taste, but if you let it boil for longer than 10 seconds, the mixture can become grainy.
3. Pour, push, and scrape the mixture through the sieve into a small, heatproof bowl. Stir in the vanilla and then cover with plastic wrap, placing it directly on the surface of the cream to prevent a skin from forming. Refrigerate for at least 4 hours, or until cold, before using. The cream can be stored for up to 3 days in an airtight container in the refrigerator.
I am a member of the Amazon Affiliate Program.











 , of which I received a review copy, by Michelle Eshkeri was great inspiration. These breads from Margot Bakery in North London are varied in origin but all rely on great flavor from sourdough. The book also includes some cakes, cookies, and bars offered at the bakery that are not made with sourdough, but I was intrigued to find Sourdough Rye Brownies, Fennel and Feta Muffins, and Aubergine Einkorn Galettes all made with sourdough in the recipes. The Margot loaf is a round, country-style loaf with Khorasan and white bread flours, and it rests for a long, slow rise in the refrigerator before baking. There’s also Focaccia, Challah, Simit, Beetroot Bread, and even laminated pastry dough all made with no commercial yeast or other leavening. There’s even a version of Rugelach made with that laminated pastry dough that looks delicious. But, it was the brioche that got my attention. I’ve made brioche several times and in different ways in the past. Most recently, my old mixer broke and I ended making a very rich brioche dough by hand with lots of kneading. I’ve made a sourdough brioche before that was used for hamburger buns, but that recipe included some yeast in the dough. Here, the brioche is definitely rich with eggs and butter, but it was all up to the starter to make it rise. I had to give it a try. I was torn between using the dough for a Babka loaf or Cinnamon Buns. Both are made with the same dough and same filling and I’ll eventually come back to try the Babka, but a cinnamon bun craving had to be addressed first.


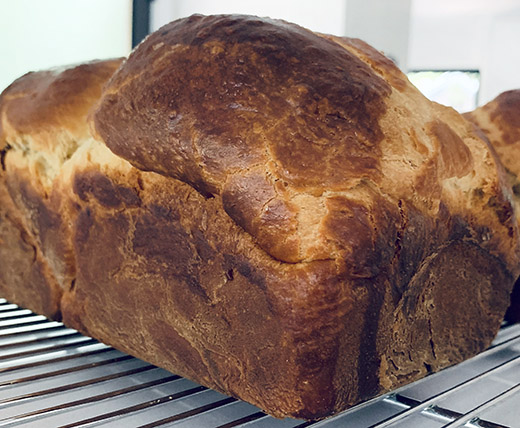
 by Margarita Manzke a couple of times. Specifically, she mentioned baking the brioche from this book and how delicious it is. Naturally, upon receiving a review copy of the book, I had to try the brioche. There are chapters devoted to some of the basic recipes that are used for several types of baked goods. Brioche is the first, and after the master recipe for brioche dough, there are several examples of how to use it including Brioche Fruit Tarts, Brioche Bread Pudding, Cardamom Sticky Buns, and more. Other chapters offer master recipes for Pain au Lait, Croissants, Kouign Amanns, Pate Sucree, Pate Brisee, and Pate a Choux. And, there are delightfully decadent recipes for using all of those types of dough. Following those chapters are ones for Muffins and Scones, Cookies and Bars, Cakes, Custards Puddings and Cream, and Basic Components. The Chocolate-Hazelnut Paris-Brest, Creme Brulee Cheesecake Tarts, and Mini-Chocolate Bundt Cakes all nearly distracted me from my intent to make the brioche first. But, I stayed on track. Now, in the days prior to tackling the brioche recipe, my trusty stand mixer of about 18 years had started acting a little funny. It didn’t seem to like operating at the lowest speed, but it was working at all the higher speeds. I was sure I could get through the dough making for this recipe by avoiding the lowest speed and working with the weirdness. Onward I went with letting a pound of butter warm a bit out of the refrigerator, cracking nine eggs, and getting the milk and locally-milled flour ready to go. And, the mixing got off to an ok start, but as soon as the dough became a bit heavy with the flour my mixer just stopped working at any speed. I was completely offended. How could it do this to me after all these years? How did it know I had all these ingredients ready to be used for a big batch of sticky, messy dough that really, really would be best made with a mixer? I didn’t seriously consider throwing out all the butter and eggs for even a moment. Instead, I started devising a plan for mixing all that butter in by hand without getting the butter too warm from my hands. Did I mention this was a big batch of sticky, messy dough? My kneading method involved using a bench scraper in one hand while turning and kneading with the other hand. After a few turns, I scooped it all into a bowl and refrigerated it for a bit before repeating. I wasn’t at all sure that this would turn into any kind of edible bread, but I was going to bake whatever became of it.


 book, and that book has never disappointed. The buns are made from the raisin brioche bread dough recipe only you skip the raisins of course. It is a three-day process to make them, but not much work is involved on any of those days. The first day is for making the sponge with both sourdough starter and some yeast, and that sits for a day. The next day, the dough is mixed, and that again is left for a day to develop flavor while it ferments. Day three is for shaping the buns and baking, and the dough is so delightful to work with and smells so fantastic, you'll be happy to do this. The only change I will make next time will be to cut the dough into fourteen buns instead of twelve because even though they were shapely and kind of stunning at a nice, big size, they were a bit bigger than I expected for hamburger buns.
