Showing posts with label sourddough. Show all posts

Friday, January 30, 2015

Meyer Lemon-Rosemary Campagne Boule

Since moving into our temporary home and using our temporary-too-small kitchen, I think I’ve spent more time reading about bread than baking bread. First, I read a review copy I received of In Search of the Perfect Loaf by Samuel Fromartz. This is a memoir of a bread baking journey. Fromartz set out to learn from other bakers in order to perfect his home bread baking, and in the process learned about different types of wheat used for flour in addition to learning new baking and dough making techniques. Time and again lately, I’ve been reading about the use of locally grown types of wheat that are fresher and more flavorful than the packaged stuff from the grocery store. Different flours present challenges and require adjustments to mixing and hydration percentages in recipes, but it’s so worth the effort to try what’s available and support the small-scale crop diversity. Fromartz visited bakers in Paris, Berlin, Cucugnan in the South of France, San Francisco, and Petaluma. Della Fattoria is located in Petaluma, California, and I first learned of this bakery from reading about it here. That led me to the next book I read recently about bread. 

I received a review copy of Della Fattoria Bread by Kathleen Weber who became a professional baker somewhat by accident. She began baking bread at home and developed a passion for it, eventually providing loaves for The Sonoma Mission Inn. Her second client was Thomas Keller of The French Laundry. Her bakery has grown substantially since then, but the artisanal process of bread making hasn’t changed. The book takes you by the hand and walks you through all the different types of bread Weber has baked at home and for the bakery over the years. The first chapters present Yeasted Breads and Enriched Bread before you get to the Pre-Fermented Breads and Naturally Leavened Breads. Last, there are Crackers, Breadsticks, Pizza Doughs, and Flatbreads. I want to make the Hot Dog Rolls because I’ve never made my own before, and the Sticky Buns look impossible to resist. I always mention that no matter how many books I read about baking bread, I always learn something new from each book. This time, I learned the technique of stuffing the dough with ingredients while shaping. There’s a Garlic Jack Campagne Boule made by spreading a garlic puree on the dough, topping that with grated Jack cheese, and then folding the dough up and around the fillings to shape the boule for proofing. Last, a hole is poked in the top of the boule and a small head of garlic is inserted into the loaf where it roasts as the loaf bakes. There’s a similar loaf made with a small bunch of grapes nestled in the top and grape leaves pressed on the surface. The loaves are beautiful and delicious-looking. I decided to attempt a loaf with a filling, and I chose the Meyer Lemon-Rosemary Campagne Boule. 

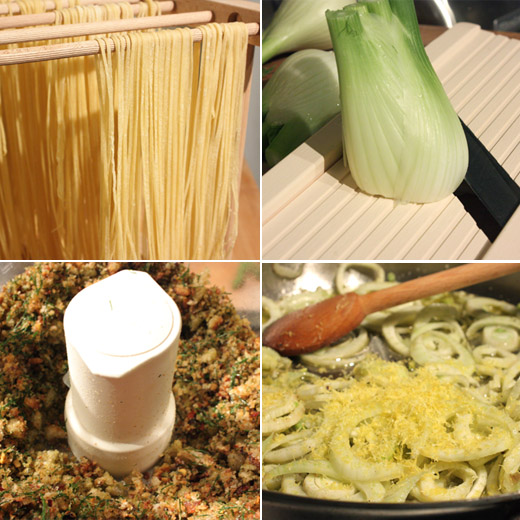
Delightfully, I had some Meyer lemons from my tree and some rosemary from our permanent home to use for this. I pop over to our property (permanent home) where our new house is being built to snip herbs when I need them. The bread was made with sourdough starter, so I needed to revive mine to get it ready to use. In the book, it’s suggested that starter be fed with a mix of all-purpose flour and whole wheat flour. I used locally grown, whole grain-whole wheat flour from Richardson Farms. The dough was made with water, starter, and all-purpose flour. Weber makes a point of mentioning that water is a large percentage of all bread dough, and the water you use should be considered. If your tap water smells or tastes off, it could affect the bread. I used filtered water. After the resting or autolyse phase, salt was added to the dough, and it was left to ferment. This was a very wet dough, and I have my troubles with wet bread doughs. It was folded and turned every 30 minutes for the first hour and a half, and then it was left to rest for another two to three hours before being pre-shaped. Since it is a wet dough, the folding and turning isn’t as simple as it could be, but I did my best. Lemon zest was mixed with chopped rosemary and olive oil. The dough was pressed into a round and dimpled with a well in the center, and the lemon-rosemary mixture was poured into the well. The dough was then carefully gathered up and around the oil mixture, the seam was pressed to seal in the oil, and the dough was turned over and formed into a boule. You can see the oil mixture spread just under the surface of the boule. The boule went into a proofing basket for two to three hours before baking. Just after slashing the top, coarse sea salt was sprinkled on top. La Baleine coarse salt was recommended, and I actually had some on hand. The book includes instructions for baking on a stone or baking in a lidded cast iron pot. I wanted to bake on a stone but probably should have known better. Of course, the dough spread a bit more than I would have liked, and a cast iron pot would have given it more support. Regardless of how it was baked, the aroma of the lemon and rosemary from the oven was fantastic. 

Adding the filling of lemon, rosemary, and olive oil was a new twist in bread making for me, and when I make sourdough breads, I usually use bread flour and a mix of other whole grain flours. Using only all-purpose flour resulted in an exceptionally tender and chewy crumb. And, the crust was crispy in the best way as a result of the oil. Even though the loaf flattened out more than I would have liked, the flavor of this bread more than made up for that small disappointment. This book has made me want to spend more time baking bread. 

Meyer Lemon–Rosemary Campagne Boule 
Excerpted with publisher’s permission from Della Fattoria Bread by Kathleen Weber (Artisan Books). Copyright © 2014. Photographs by Ed Anderson. 

Makes 1 large boule 

This has become our signature bread. Lemon zest and finely chopped rosemary are mixed with olive oil to make a pesto-like slurry that appears as a bright and delicious swirl along the underside of the crust. But what really sets the bread apart is its raised crown design, studded with large salt crystals. Ed, my husband, tells everyone to eat this bread toasted with soft-boiled eggs. I love cutting thick slices of the bread and grilling them over low coals, or pulling it apart and eating it just as it is. 

1 1/2 tablespoons (8 grams/0.3 ounce) grated lemon zest, preferably from Meyer lemons 
1 1/2 tablespoons (6 grams/0.2 ounce) chopped rosemary 
About 3 tablespoons (40 grams/1.5 ounces) olive oil 
Pain de Campagne Boule, taken through the pre-shape 
1 to 1 1/2 teaspoons (4 to 6 grams/1.4 to 2 ounces) coarse sea salt (see Note) 

1. Combine the lemon zest and rosemary in a small bowl. Add enough olive oil to create a pesto-like slurry. 
2. After the 10-minute rest, turn the dough over (flour side against the work surface) and gently press into a 9- to 10-inch round. Dimple the top, make a well, and add the rosemary mixture to the well. Fold the sides in, as when forming a boule, enclosing the mixture, then tighten the boule against the work surface until you just begin to see the rosemary mixture under the surface of the dough. 
3. Generously dust a 9-inch bread basket or linen-lined bowl with flour or a mixture of flour and wheat bran. Follow the remaining steps for proofing and baking the bread, and when ready to score, score it with a 4-scored asterisk. It will be because of the slurry underneath that the points raise into a crown as it bakes. Sprinkle the sea salt over the top. 

Note on coarse sea salt 
I prefer La Baleine coarse sea salt (in the red canister). The crystals are clear and shiny like diamonds, and they won’t melt. 

Pain de Campagne Dough 

Makes 1.35 kilograms/3 pounds 

A request from Thomas Keller right after he reopened The French Laundry in 1995 got me into making pain de campagne. So I asked Thomas lots of questions. (How do you envision serving this bread? Do you like lots of crust? What shape would look best on your bread and butter plate?) In the end, I created the bread he was looking for. For Thomas, I shaped the dough into batards. Here we make both a batard and a boule.  

Firm Starter 126 g -  4.4 oz - 1/2 cup 
Water at 80°F/27°C 506 g -  17.8 oz - 2 cups plus 2 1/2 Tbsp 
All-purpose flour 704 g - 24.8 oz - 5 cups 
TOTAL FLOUR 704 g - 24.8 oz -  5 cups 
Fine gray salt 19 g -  0.6 oz - 1 Tbsp 
TOTAL WEIGHT 1,355 g/1.35 kg - 47.6 oz/3 lbs 

1. Lightly oil or spray a deep 4 1/2- to 5-quart ceramic or glass bread bowl. 

2. Put the starter in the bowl of a stand mixer fitted with the paddle attachment. Add the water and mix on low speed until the starter is broken up and the mixture appears frothy, about 30 seconds. Add the flour and pulse a few times on the lowest setting (to keep the flour from flying out of the bowl), then mix on low speed for 2 minutes to combine. Remove the paddle attachment, scraping any dough from the paddle back into the bowl with a plastic bowl scraper, and let sit, uncovered, for 20 minutes. 

3. Scrape down the sides of the bowl with the bowl scraper and add the salt. Fit the mixer with the dough hook and mix on low speed for 6 minutes. This is a slightly sticky dough. Using the bowl scraper, turn the dough into the bread bowl. Cover tightly with a lightly oiled or sprayed piece of plastic wrap and let sit for 30 minutes. 

4. For the first fold, wet your hands, then loosen the dough from the sides and bottom of the bowl and fold it underneath itself from left to right and then top to bottom. Cover and let sit for 30 minutes. 

5. For the second fold, repeat as for the first fold. Cover and let sit for 30 minutes. 

6. For the third and final fold, repeat the folding as before. Cover and let proof in a warm, draft-free spot until there is bubbling on the surface of the dough, 2 to 3 hours. 

7. The dough is ready to be pre-shaped and shaped for Meyer Lemon–Rosemary Campagne Boule. 

I am a member of the Amazon Affiliate Program.

Friday, May 11, 2012

Peanut Chile Bread

It had been months, actually almost two years, since I saw Dan Lepard’s Peanut Chile Bread, and it was high time I tried making it. But, every time I set out to make a bread with commercial yeast, my sourdough starter feels neglected, overlooked, like I’m cheating on it. I couldn’t have that. It had been too long since my starter and I had spent time together, so I took Dan’s recipe and combined it with the sourdough bread recipe that I use more than any other. That is the Norwich Sourdough that came from Susan at Wild Yeast. From Dan’s recipe, there are roasted, spicy, red chiles, cumin seeds, peanuts, chunky peanut butter, and tahini. I mixed all of those ingredients into the Norwich sourdough right after the autolyse, and it worked like a charm. I got to try this bread without breaking my starter’s heart. The result was sesame-crusted loaves with a rosy-hued crumb from the chiles. It was nutty and a little spicy and perfect with some olive oil for dipping.

I used fresno chiles, but whichever red chile you prefer is fine. They were roasted under the broiler and left to cool. Stems and seeds were removed, and the chiles were chopped. Tahini, peanut butter, cumin seeds, and salt were placed in a bowl, and hot water was poured over them. The chopped chiles were added along with some cold water and the peanuts. Since I was turning this into a sourdough, I used one-third of the total water for the recipe at this stage. The other two-thirds was used to begin the dough by combining it with starter, bread flour, and rye flour. That was mixed in a stand mixer with a dough hook for a few minutes and then left to sit for 20 minutes. After 20 minutes, the chile and peanut butter mixture was added to the dough, and it was mixed until well incorporated. The dough was then left to rise in a wide bowl in which it could be turned without removing it to a work surface. The dough was turned at 50 minutes and then at 100 minutes while fermenting for a total of two and a half hours. After fermentation, the dough was turned onto a work surface and divided. It was allowed to rest before being shaped into long loaves. The loaves could have proofed at room temperature until ready to bake, but I proofed them partially at room temperature and then overnight in the refrigerator. The next morning, as the oven pre-heated, the loaves were brushed with water, sprinkled with sesame seeds, and slashed down the middle. They baked until golden and crisp-crusted.

This flavorful bread was great alongside a salad and with soup, but my favorite use of it was for spicy carrot sandwiches. Those sandwiches were mentioned in the March issue of Food and Wine. After toasting the bread, hummus was spread on it and then topped with grated carrots that had been briefly cooked with sliced garlic, crushed red pepper, and I used cumin seeds instead of caraway. A spoonful of Greek yogurt finished the sandwich. The nutty bread and spicy carrots made a great match.

I’m submitting this to Yeastspotting where you’ll find some seriously well-made bread.


Saturday, January 7, 2012

Polenta and Pepita Country Bread

One of my resolutions for 2012 is to keep trying with the very-wet category of bread dough. I’ve been open about my inability to bake ciabatta with a fabulous, holey structure. And, it’s not just ciabatta that flummoxes me. The basic country bread from Tartine Bread is also made with a very wet dough, and I’ve yet to create anything with big holes from that recipe either. The baking technique suggested in that book is the covered cast iron pot method. A proofed loaf goes into a hot cast iron pot, the pot is covered with a hot lid, and the moisture from the dough steams inside the pot as the bread begins to bake. I’ve had mixed results with that method in the past. On one occasion, the dough was just too wet, and the resulting baked loaf was a little soggy on the bottom. I made some changes to the dough, tried again, and this time, the cast iron pot baking method worked fine. To hedge my bets since this recipe makes two loaves, I actually baked one loaf in the cast iron pot and one directly on a baking stone. The loaf from the cast iron pot was the better of the two since the pot prevented the loaf from spreading. However, I still didn’t find those lovely, big holes in the crumb. Hence, I vowed my resolution to keep trying. In Tartine Bread, after introducing the basic country bread, there are a few variations including this polenta and pepita option. Soaked, coarse-grained polenta, toasted pepitas, and chopped fresh rosemary are added to the basic dough. It’s a chewy, hearty bread with a crunchy, dark crust.

I mentioned that I made a couple of changes this time. First, one of the suggestions for beginning the basic country loaf is to make a leaven using only a tablespoon of mature starter to prevent the resulting dough from having a too-sour flavor. My mature starter isn’t very sour in flavor, so I ignored that and just fed my starter as usual to use as the leaven for the dough. Next, the dough is suggested to be mixed by hand, but I used a stand mixer with a dough hook because it’s easier. The leaven was combined with water, white flour, and whole wheat flour and left for the autolyse. After about 20 minutes, another 50 grams of water was to have been added. Since my dough seemed extra wet last time, I skipped that additional 50 grams of water. Also after the autolyse, salt was added. Then, the dough was to have been placed in a bowl for the bulk fermentation with turns every half hour. The soaked polenta, toasted pepitas, chopped rosemary, and some corn oil were to have been added after the second turn. I followed those instructions when I made the flax and sunflower seed whole wheat bread, and it was difficult to get the seeds mixed into the dough at that point. So this time, I added the polenta, etc. in the mixing bowl along with the salt right after the autolyse. Then, I transferred the dough to a bowl to ferment for about four hours. It was turned in the bowl every 30 minutes. After four hours, the dough was transferred to a work surface and divided into two pieces. Each piece was shaped into a round, but the wet dough spreads easily so the rounds should be well-spaced apart. The rounds were left to rest for 30 minutes. Final loaf shapes were then formed, and towel-lined baskets were sprinkled with a mixture of rice flour and wheat flour before the loaves were placed in them. I opted for a delayed final rising of the dough by covering the proofing baskets and leaving them in the refrigerator overnight. The next day, I baked one loaf in a heated cast iron pan. After twenty minutes of baking, the lid was removed. I baked the other loaf on parchment, which made the wet dough easier to transfer from the peel, directly on a baking stone. The loaf on the stone spread more and browned more, and the cast iron pot method worked well.

What I’ve learned is that maybe sometimes a wet dough is just too wet. Skipping the additional water seemed to be a good thing with this version. I still haven’t learned how to get those lovely holes throughout a loaf, but hopefully if practice doesn’t make perfect it will eventually make better. Meanwhile, I had two big, round loaves of rustic, homemade bread full of crunchy pumpkin seeds and corn and rosemary flavors to enjoy.

I’m submitting this to Yeastspotting where you’ll find some seriously well-made bread.


Monday, May 23, 2011

Rosemary-Olive Oil Bread

From the looks of things around here, it doesn't seem like I've been baking much bread. The last time I mentioned baking a loaf of bread was on January 12. The truth is that I have been baking bread. I just haven't been thrilled with what I've baked. You see, ciabatta has become my nemesis. I set out to bake loaves of chewy, airy, holey ciabatta, and my results have been less than perfect. Some loaves have a few holes but not enough, and other loaves have a crumb that looks the same as my sourdough baguette. I've tried different recipes and techniques and eventually got to the point of dreading the moment of cutting into a baked and cooled loaf. Now, I have a freezer stocked with loaves of bread disappointments. I may have to admit defeat eventually, but I'm sure I'll try again as soon as I clear out some freezer space. For now though, I needed to move on, change things up, and bake a different kind of bread. I went back to the Breads from the La Brea Bakery book and chose the rosemary-olive oil bread recipe. In the headnote, this bread is described as having a "multifaceted flavor in which the rosemary is a strong but not overpowering element," and the olive oil coats "the gluten strands and make[s] a softer dough than usual." It was to have a uniform crumb and is basically a white dough flavored with herbs. This was perfect. A holey crumb was not the goal here, and that's the change in bread baking I needed.

As usual, the two-day dough process turned into three days for me because I always need to bring my sourdough starter to room temperature and feed it the day before mixing the dough. Then, on day two, the dough was mixed by combining water, white starter, bread flour, and wheat germ in a mixer with a dough hook. It was left for the autolyse, and there's a fantastic description of exactly what that 20 minute resting period is all about at A Bread a Day. After the autolyse, salt was added to the dough, and then chopped, fresh rosemary and olive oil were mixed in as well. It didn't seem like the olive oil was getting well-mixed into the dough in the mixer, so I transferred it to a board and kneaded by hand until the oil was incorporated. The dough was placed in an oiled bowl, covered, and left to ferment for about three and a half hours. It was then placed on a floured board, cut into two pieces and allowed to rest for a bit. After the rest, each piece was shaped into a boule, both were placed in proofing baskets, the baskets were covered, and the dough was left to rise at room temperature for an hour and a half. At that point, the baskets were covered with plastic and refrigerated for 12 hours. The next day, the baskets were removed from the refrigerator so the dough could warm up for a couple of hours before baking. I baked the two loaves at the same time on a baking stone, and the oven was spritzed with water from a spray bottle during the first five minutes of baking. After a total baking time of about 40 minutes, the loaves were browned and crisp on the surface.

As promised, the flavor from the rosemary was evident but not too strong. The tender texture of the crumb and the crispness of the crust were due to the olive oil. This made me excited about bread again. Not only did I finally have a couple of loaves that weren't failures, they were also very flavorful. This is a bread I'll look forward to baking and cutting into again, and then I'll think about going another round with ciabatta.

I’m submitting this to Yeastspotting where you’ll find some seriously well-made bread.


Wednesday, January 26, 2011

Spaghetti with Fennel, Chile, Lemon, and Breadcrumbs

It’s true that I have trust issues with recipes. If I’m skeptical, I may proceed as instructed, but I try to be prepared should I feel the need to change course. So, although I was intrigued by a pasta recipe that suggested a topping of breadcrumbs in place of parmesan, I had a wedge of parmigiano reggiano ready and waiting just in case. This came from Delicious magazine a few months ago, and I can’t seem to locate the recipe online so I’ll include it below. Spicy breadcrumbs were made by toasting chunks of day-old bread that had been tossed with olive oil and dried chile flakes and then processing them to crumbs once cool. They were tasty breadcrumbs, and they were certainly going to add a flavorful, crispy element to the pasta dish, but I wasn’t convinced they could completely replace the experience of a good parmigiano reggiano. I had just received some fennel from my CSA, and making fresh pasta is one of my most favorite kitchen tasks, so with some back-up parmesan to shred over each plate of pasta should it be necessary, I was ready to experiment.

I made the fresh pasta from Stir: Mixing It Up in the Italian Tradition since this has become my go-to pasta recipe. I cut the fresh pasta sheets into thin spaghetti and let the strands dry for a bit while working on the breadcrumbs. Half a loaf of day-old bread, and I used some leftover Norwich sourdough which had been stored in the freezer since Christmas, was cut into chunks and tossed with extra virgin olive oil, salt, and red chile flakes. The bread chunks were toasted on a sheet pan in the oven until dry and crisp, and they were left to cool. Then, they went into a food processor with some fronds from the fennel and were pulsed until crumbly. Next, the fennel bulbs were prepped by slicing them thinly with a mandoline or Benriner. Lemon rind was supposed to have been cut into thin ribbons, but Kurt isn’t a fan of big pieces of citrus rind in savory dishes, so I zested the lemon with a microplane instead. Last, garlic was minced, and cooking could commence. While water for the pasta boiled, olive oil was heated in a large saute pan. The fennel and garlic were gently cooked over medium heat so as not to brown the fennel but just to allow it to soften. The lemon zest was added, and after a short dunk in the boiling water, the drained pasta was added with lemon juice and more olive oil. Everything was tossed about in the pan to combine and warm through, and then it was served topped with the breadcrumbs.

This dish ended up delivering two surprises. First, I had assumed the fennel would retain its anise bite since it was so gently cooked. Although it didn’t even brown in the pan, it did soften and become sweeter and was not at all like sharp, raw fennel. The bright lemon juice and zest mingled nicely with it. The other surprise was that the breadcrumbs were delicious and satisfying in a way that I didn’t expect at all. With the salt, chile flakes, and fennel fronds, the crunchy bits of bread were all the dish needed. At the end of the meal, the wedge of parmigiano reggiano had gone completely untouched.

Spaghetti with Fennel, Chile, Lemon, and Breadcrumbs
adapted from Delicious magazine

half a loaf of day-old bread such as a sourdough rustic loaf or ciabatta
2 teaspoons dried chile flakes
1/2 cup extra virgin olive oil
3 garlic cloves, minced
2 organic lemons (organic is important here since the peel will be used)
3 fennel bulbs
12 ounces long strands of thin pasta (make fresh pasta if you have time)
Salt and pepper to taste

-Pre-heat oven to 400 degrees F. Cut or pull the bread into chunks and place on a baking sheet. Toss the bread chunks with two tablespoons of the olive oil, the dried chile flakes, and a big pinch of salt. Spread the pieces into an even layer and bake for about 10 minutes until golden and crisp. Then, set aside and allow to cool.

- Zest one lemon and then cut both in halve to be juiced. Remove and discard the outer leaves of the fennel and reserve 1/2 cup of the fronds. Thinly slice the fennel, and using a Benriner is the quickest way to do it.

- Place the fennel fronds and cooled bread chunks in a food processor and pulse until crumbly.

- Boil a large pot of salted water for the pasta, and time the cooking of the pasta for it to be ready when the fennel and lemon zest have cooked (fresh pasta will cook must faster than dried). Meanwhile, heat three tablespoons olive oil in a large saute pan over medium heat. Add the sliced fennel to the saute pan, and cook while stirring for a couple of minutes. Add the minced garlic and continue to cook for three minutes until the fennel begins to soften. Add the lemon zest, reduce heat to low and cook for another five minutes or so. The goal is for the lemon and garlic flavors to meld with the fennel, but the fennel should only gently cook and not brown. When the pasta has cooked, drain it and add it to the saute pan. Add the juice from the two lemons and the remaining olive oil, and toss to combine.

- Serve the pasta and fennel topped with a generous handful of the breadcrumbs, and I promise you won’t need a single shred of parmesan.


I’m submitting this to Yeastspotting where you’ll find some seriously well-made bread.


Blogging tips